
Views: 0 Author: Site Editor Publish Time: 2026-07-13 Origin: Site


Upgrading or designing vanity panels requires balancing aesthetic clarity and structural safety. Traditional glass often falls short in these exact areas because of its heavy weight and high shatter risks. You want a beautiful, highly functional bathroom space. However, you also need materials you can safely rely on for daily use in humid environments. While a mirror acrylic sheet offers superior impact resistance and exceptional fabrication flexibility, choosing the wrong specification leads to major headaches. A poorly chosen sheet frequently causes warping, adhesive damage, or the dreaded "funhouse effect" where your reflection looks stretched and distorted. This visual distortion instantly ruins the professional look of any architectural space. This guide provides an evidence-based framework for evaluating, specifying, and installing acrylic mirrors for residential and commercial vanity applications. We will thoroughly explore necessary thickness requirements, strict substrate preparation rules, and specific chemical adhesive constraints. You will learn exactly how to ensure high optical fidelity and long-term durability for your next installation project.
Thickness dictates optical clarity: Thicker sheets (minimum 1/4” or 6mm) are mandatory for vanity panels to prevent surface distortion.
Substrate preparation is non-negotiable: Acrylic is inherently flexible; it requires a perfectly flat, rigid backing (like MDF) to function as a true mirror.
Adhesive selection prevents failure: Solvent-based mastics will destroy the reflective backing; specific acrylic-safe adhesives are required for installation.
Shatter resistance drives ROI: A reflective plastic sheet is up to 10 times more break-resistant than glass, significantly reducing liability in high-traffic or commercial bathrooms.
When professionals design modern washrooms, they constantly evaluate material options. Glass served as the default standard for decades. However, a vanity acrylic panel delivers distinct, measurable advantages over glass. These advantages directly impact safety protocols, installation logistics, and on-site labor requirements.
Safety and compliance rank highest among these material benefits. Acrylic demonstrates remarkable structural resilience under stress. It boasts incredible shatter resistance compared to standard fragile materials. When subjected to extreme blunt force impact, acrylic breaks into large, dull pieces. It never shatters into dangerous, jagged shards. This structural behavior easily meets strict safety codes required for modern schools, public gyms, and commercial washrooms. By minimizing breakability, facility managers significantly lower liability risks in high-traffic environments where accidents frequently occur.
Weight reduction provides another highly compelling factor for architectural specification. Acrylic weighs roughly half as much as standard glass of the exact same dimensions. This lighter profile dramatically reduces the load-bearing requirements on underlying cabinetry systems and drywall partitions. Installers can easily handle larger architectural panels without requiring heavy-duty lifting equipment. Shipping logistics also improve. Moving lighter materials up construction elevators in high-rise buildings requires far less effort. Workers also avoid installing excessive, visually intrusive wall anchors just to keep the mirror safely on the wall.
Fabrication flexibility ultimately seals the business case. Plumbers, electricians, and carpenters can modify acrylic directly on the job site. If you need to drill precise holes for vanity sconces, electrical outlets, or heavy plumbing fixtures, you can do it immediately. You do not need specialized glass-cutting machinery or diamond-tipped hole saws. Installers simply use standard acrylic drill bits and fine-tooth woodworking saws. This incredible ease of customization saves countless labor hours. It also prevents costly project delays when field measurements differ slightly from original blueprints.
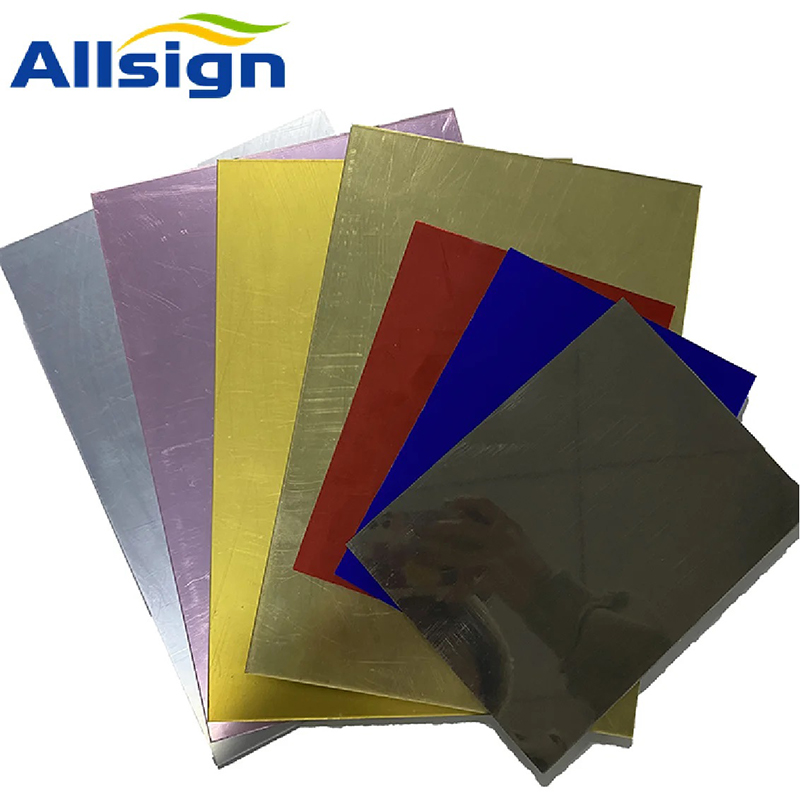
Choosing the perfect material requires a deep understanding of physical material properties. You must rigorously evaluate sheet thickness, moisture defense capabilities, and final edge finishes before placing an order.
Many first-time users face understandable skepticism about plastic mirrors. They worry about the inherently flexible nature of extruded or cast plastics. The warping reality remains completely true for thin profiles. Thin sheets, specifically those measuring 1/8" (3mm), absolutely will warp. They easily conform to minor wall imperfections, bowing inward and outward. This creates severe optical distortion over wide reflective areas.
The solution requires strict adherence to specification standards. We highly recommend mandating a 1/4" (6mm) thickness for any high reflect acrylic sheet functioning as a primary vanity mirror. This heavier thickness guarantees necessary structural rigidity. The added mass resists bending forces and bridges minor substrate flaws effectively. It maintains excellent optical fidelity and actively prevents the frustrating funhouse effect.
Bathroom environments constantly subject building materials to intense humidity, steam, and direct water splashes. You need panels capable of handling moisture exceptionally well over decades. Acrylic naturally resists water absorption, making it an excellent base material for washrooms.
However, backing protection remains the most critical longevity factor. High-quality acrylic mirrors feature a specialized vacuum-metalized backing. Manufacturers deposit a micro-thin layer of reflective aluminum onto the plastic surface inside a vacuum chamber. A tough, highly scratch-resistant painted coating must then seal and protect this sensitive metallic layer. This protective barrier prevents desilvering. Industry professionals often call this degradation "black edge rot." Desilvering frequently destroys cheap glass mirrors in damp environments when moisture penetrates the porous silvering. Proper backing protection ensures your installation retains a pristine, flawless reflection.
Exposed edges require specific attention during the fabrication phase. Installers must polish all exposed edges on a plastic panel. Polishing prevents microscopic stress cracks from forming and ensures a premium visual finish. Flame polishing melts the very outer layer of the edge, creating a smooth, glossy perimeter. Diamond polishing utilizes a specialized spinning hub to shave the edge perfectly flat and highly transparent.
When comparing optical clarity against traditional glass, you must maintain realistic expectations. A premium plastic panel absolutely rivals glass in initial optical clarity. However, the surface remains slightly more susceptible to physical scratching from abrasive materials. Implementing specific, gentle maintenance protocols ensures the surface stays flawless. Always prioritize non-abrasive cleaning tools over standard paper towels.
Performance Feature | 1/4" Mirror Acrylic Sheet | Traditional Glass Mirror |
|---|---|---|
Shatter Resistance | Extremely High (Up to 10x stronger) | Low (Shatters into dangerous shards) |
Weight Profile | Lightweight (Approx. 50% lighter) | Heavy (Demands reinforced mounting) |
On-Site Fabrication | Simple (Drill and cut with standard tools) | Complex (Requires diamond tools/waterjets) |
Optical Rigidity | Excellent (Strictly requires a flat substrate) | Excellent (Inherently rigid on its own) |
Even the highest quality materials fail completely if installed incorrectly. Visual distortion represents the absolute biggest risk when utilizing plastic mirrors. You can easily prevent these architectural failures by strictly following established installation protocols.
A reflective plastic sheet acts like a structural skin. It will exactly conform to whatever surface you mount it to. If the underlying wall bows, the mirror will inevitably bow. The mounting substrate entirely dictates the final optical quality. Substrates like high-density MDF, thick plywood, or exceptionally smooth Level 5 drywall work best. The surface must be structurally sound, perfectly plumb, and completely flat. Installers must sand down any raised bumps. They must fill any recessed divots using appropriate leveling compounds before applying the mirrored panel. If you mount acrylic to an uneven wall, you guarantee optical failure.
Adhesive selection represents a catastrophic risk factor if ignored. The wrong chemical glue literally destroys the product from the inside out.
What to avoid: Never use standard construction adhesives like typical heavy-duty mastics. Do not use standard bathroom silicones containing acetic acid. You must avoid solvent-based glues completely. These aggressive chemicals release potent vapors as they cure. They eat entirely through the vacuum-metalized backing. This violent chemical reaction leaves permanent, ugly black spots on the front of the mirror.
What to use: You must specify a 100% neutral-cure silicone. Alternatively, use specialized acrylic mirror mastics formulated specifically for plastics. Application technique matters just as much as chemical composition. Apply the adhesive in straight, vertical strips. Do not apply it in grids, closed loops, or circular patterns. Closed loops create a vacuum seal. They trap curing vapors against the backing. Vertical strips allow trapped vapors to safely vent upward behind the panel. This open-channel method ensures flat, stress-free adherence.
Plastics naturally expand and contract as ambient temperatures fluctuate. Bathrooms experience frequent, extreme temperature swings from hot showers and HVAC cycling. If you secure the panel too tightly within a rigid metal or wood frame, thermal expansion causes severe bowing.
You must leave a 1/16” to 1/8” gap around all edges of the framing system. This perimeter expansion joint allows the plastic to move safely. It expands without hitting hard stops and compromising the flat reflective surface.
Temperature Fluctuation (ΔT) | Estimated Material Expansion (Per 48" Panel) | Recommended Perimeter Gap |
|---|---|---|
10°F (Minor shift) | Approx. 1/64" | Minimum 1/16" |
20°F (Moderate shift) | Approx. 1/32" | Standard 1/16" |
40°F (Extreme steam room shift) | Approx. 1/16" | Maximum 1/8" |
Follow this checklist to guarantee proper installation:
Verify substrate flatness using a high-quality 4-foot level before proceeding.
Seal highly porous substrates like MDF with a quality primer before gluing.
Select only completely neutral-cure silicone mastic for your project.
Apply mastic strictly in even, vertical lines spaced a few inches apart.
Leave minimum 1/16" perimeter gaps to accommodate inevitable temperature fluctuations.
Partnering with an experienced supplier guarantees a significantly smoother installation process. Not all material distributors process architectural plastics utilizing the same level of care. You need a trusted supplier who truly understands the physical nuances of mirrored plastics.
First, demand absolute cut-to-size precision. Emphasize the vital importance of suppliers who offer professional CNC routing. Precision laser cutting also works exceptionally well for exacting vanity dimensions. Advanced machinery delivers your panels cut to exact, micro-millimeter tolerances. This precision completely eliminates the need for risky, messy on-site resizing. It guarantees perfectly square corners and clean edges for seamless, immediate mounting.
Second, thoroughly inspect the protective masking upon delivery. Ensure your supplier ships every single panel covered in a heavy-duty film masking. This film must completely cover the front viewing surface. This masking acts as a mandatory barrier against accidental scratches during transit, unloading, and handling. Installers must leave this protective film completely intact. They should only peel it away after the installation process finishes entirely and the work area is perfectly clean.
Third, prioritize physical samples and initial prototyping. We strongly advise all buyers to request small sample tiles. You should do this long before committing to large bulk commercial orders. You can use these individual tiles to test adhesive chemical compatibility on your specific wall substrate. Samples also allow designers to gauge the actual reflective quality under a bathroom's unique lighting conditions.
Verify the immediate availability of strict 1/4" thickness options.
Confirm the use of professional CNC technology for precision edge cutting.
Ask about the specific heavy-duty protective film used during shipping and handling.
Request a small sample piece for localized adhesive outgassing testing.
Upgrading your interior space using a plastic mirror provides a highly beneficial, modern alternative to heavy glass. It remains an exceptional, extremely safe, and significantly lightweight choice. However, project success relies heavily on adhering to strict architectural specification rules. You must aggressively insist on a 1/4" material thickness to maintain excellent, distortion-free optical clarity. Furthermore, you must follow non-negotiable installation rules regarding perfectly flat wall substrates and neutral-cure adhesives.
Your immediate next steps involve conducting a thorough physical audit of your installation environment. Check your bathroom's average moisture levels. Carefully measure the exact flatness of your intended backing wall using a reliable straightedge. Once you verify your structural readiness, reach out to a reputable plastics distributor. Request a custom cut-to-size quote to kickstart a seamless, stunning, and highly secure bathroom renovation today.
A: Yes, like standard glass, it will collect condensation in a humid room. However, acrylic retains ambient heat slightly better than glass. This thermal property means it may actually clear up faster after a hot shower. You can also apply specialized anti-fog sprays formulated specifically for plastics to minimize condensation buildup entirely.
A: Never use paper towels or ammonia-based glass cleaners like Windex. Ammonia causes irreversible clouding, and paper fibers create micro-scratches. Instead, use a very clean, soft microfiber cloth. Wash the surface gently using a dedicated plastic cleaner, such as Novus #1, or simply use mild soapy water.
A: Yes, you can laser cut these sheets. However, the cutting must be done mirror-side up or down, depending heavily on your specific laser setup and masking type. This prevents the heat from melting or peeling the sensitive reflective backing along the edges. For thicker sheets, commercial CNC routing is often preferred to maintain a perfectly clean edge.


